Difference between revisions of "Vasara 2"
| (21 intermediate revisions by 2 users not shown) | |||
| Line 10: | Line 10: | ||
|imagescalepx = 180px | |imagescalepx = 180px | ||
| − | |developer = | + | |developer = [[Visco]] |
| | | | ||
| − | | | + | |director = Teruhiro Yamada |
| | | | ||
| − | | | + | |music = Kennosuke Suemura |
| | | | ||
| − | |art = | + | |art = Tetsuya Mizutani</br>Yasuhiro Sawamura</br>Yoriko Date</br>Hiromi Kashiwamata</br>Hiroshi Yamamoto |
| | | | ||
|releasedate = 2001 | |releasedate = 2001 | ||
| − | |previousgame = | + | |previousgame = [[Vasara]] |
| − | |||
}} | }} | ||
| − | '''Vasara 2''' | + | '''Vasara 2''' is the second and finale game in the [[Vasara]] series of shoot-em-ups, as well as the finale game to be developed and released by [[Visco]]. Unlike most games of the genre, Vasara 2 draws heavily from the history of feudal Japan, rather than depicting a possible future. The game features a 'Sengoku-steampunk'<ref>[https://shmups.system11.org/viewtopic.php?t=25188 Tar-Palantir's Vasara 2 Review on System11]</ref> theme similar to [[Psikyo]]'s ''Sengoku Ace'' series. |
| − | The | + | The ''Vasara series'' was ported to modern platforms in the form of the VASARA Collection on August 13, 2019. |
| Line 36: | Line 35: | ||
== Gameplay Overview == | == Gameplay Overview == | ||
| − | + | ''Vasara 2'' is a two-button shooter. | |
| − | Unlike most other games of the genre, the player is not destroyed or powered down when coming into contact with an enemy. | + | Unlike most other games of the genre, the player is not destroyed or powered down when coming into contact with an enemy. Instead, they're knocked backwards at an angle relative to the point and direction of contact. |
There are two modes available for play: '''Easy''' and '''Hard''' | There are two modes available for play: '''Easy''' and '''Hard''' | ||
| Line 49: | Line 48: | ||
=== Controls === | === Controls === | ||
---- | ---- | ||
| − | * '''A (Press):''' Fires the players shots in tandem | + | * '''A (Press):''' Fires the players shots in tandem (Main and Sub). |
* '''A (Hold):''' Charges the players charge attack. Release to use. | * '''A (Hold):''' Charges the players charge attack. Release to use. | ||
* '''B:''' Unleashes a Vasara attack. | * '''B:''' Unleashes a Vasara attack. | ||
| Line 55: | Line 54: | ||
=== Unlockable Secrets === | === Unlockable Secrets === | ||
---- | ---- | ||
| − | The games one and only '''extend''' drops from the nineteenth mid boss defeated | + | The games one and only '''extend''' drops from the nineteenth mid-boss defeated (third mid-boss of stage five at earliest).<ref name= vasara2_guide /> |
There is a TLB and ending waiting at the end of the second loop.{{unconfirmed}} | There is a TLB and ending waiting at the end of the second loop.{{unconfirmed}} | ||
| − | === Characters / Ships | + | === Characters / Ships === |
---- | ---- | ||
{| class="wikitable" style="text-align: center" | {| class="wikitable" style="text-align: center" | ||
| Line 66: | Line 65: | ||
|- | |- | ||
| [[File:Takeda_portait.jpg | 100px]] <br> <span style="color:#FF0000">'''Takeda Nobukatsu'''</span> || [[File:Takeda_bike.gif]] <br> <span style="color:#FF0000">'''嵐桜花'''</span> <br> <span style="color:#FF0000">'''Stormy Cherry Blossom'''</span> || [[File:Takeda_symbol.gif | 100px]] || [[File:Takeda_shot.gif | 60px]] || [[File:Takeda_charge.gif | 40px]] || #4 | | [[File:Takeda_portait.jpg | 100px]] <br> <span style="color:#FF0000">'''Takeda Nobukatsu'''</span> || [[File:Takeda_bike.gif]] <br> <span style="color:#FF0000">'''嵐桜花'''</span> <br> <span style="color:#FF0000">'''Stormy Cherry Blossom'''</span> || [[File:Takeda_symbol.gif | 100px]] || [[File:Takeda_shot.gif | 60px]] || [[File:Takeda_charge.gif | 40px]] || #4 | ||
| + | |- | ||
| + | | colspan="13" style="text-align:left;" | | ||
| + | |||
| + | Age: 16 | ||
| + | |||
| + | He seeks revenge on Nobunaga's life in order to avenge his father Katsuyori (Suwa Shiro Katsuyori), who was defeated in the Battle of Tenmokuyama and committed suicide, and to restore the Takeda clan... | ||
| + | |||
| + | ...Originally, Nobukatsu was the legitimate successor to the late Takeda Shingen, and his father was the head of the family. Nobukatsu was forced to flee to protect the Takeda family's legitimacy, but he prayed that the Takeda family would not be able to revive unless he avenged the deaths of his father and senior retainers, and so he charged alone into the enemy camp. | ||
| + | |} | ||
| + | |||
| + | {| class="wikitable" style="text-align: center" | ||
| + | |- | ||
| + | ! Character !! Ship !! Symbol !! Shot & Sub Shot !! Charge Attack !! Ship Speed | ||
|- | |- | ||
| [[File:Momochi_portrait.jpg | 100px]] <br> <span style="color:#FFD700">'''Momochi Sandayu'''</span> || [[File:Momochi_bike.gif]] <br> <span style="color:#FFD700">'''菊月'''</span> <br> <span style="color:#FFD700">'''Chrysanthemum Moon'''</span> || [[File:Momochi_symbol.gif | 100px]] || [[File:Momochi_shot.gif | 80px]] || [[File:Momochi_charge.gif | 100px]] || #2 | | [[File:Momochi_portrait.jpg | 100px]] <br> <span style="color:#FFD700">'''Momochi Sandayu'''</span> || [[File:Momochi_bike.gif]] <br> <span style="color:#FFD700">'''菊月'''</span> <br> <span style="color:#FFD700">'''Chrysanthemum Moon'''</span> || [[File:Momochi_symbol.gif | 100px]] || [[File:Momochi_shot.gif | 80px]] || [[File:Momochi_charge.gif | 100px]] || #2 | ||
| + | |- | ||
| + | | colspan="13" style="text-align:left;" | | ||
| + | |||
| + | Age: 15 | ||
| + | |||
| + | During the attack on Iga in 1581 (Tensho Iga Rebellion), her father Tanba no Kami was killed by Nobunaga's son Nobuo. Aiming to rebuild Iga, which had suffered devastating damage, she took on the title of "Sandayu," which gave her control over the three great Iga ninja families: Hattori, Fujibayashi, and Momochi. | ||
| + | |||
| + | After becoming the leader of the Iga clan, she is asked by a certain person to assassinate Nobunaga as a condition for the revival and stability of Iga... | ||
| + | |} | ||
| + | |||
| + | {| class="wikitable" style="text-align: center" | ||
| + | |- | ||
| + | ! Character !! Ship !! Symbol !! Shot & Sub Shot !! Charge Attack !! Ship Speed | ||
|- | |- | ||
| [[File:Akechi_portrait.jpg | 100px]] <br> <span style="color:#0000FF">'''Akechi Mitsuhide'''</span> || [[File:Akechi_bike.gif]] <br> <span style="color:#0000FF">'''桔梗'''</span> <br> <span style="color:#0000FF">'''Balloon Flower'''</span> || [[File:Akechi_symbol.gif | 100px]] || [[File:Akechi_shot.gif | 120px]] || [[File:Akechi_charge.gif | 80px]] || #5(Slowest) | | [[File:Akechi_portrait.jpg | 100px]] <br> <span style="color:#0000FF">'''Akechi Mitsuhide'''</span> || [[File:Akechi_bike.gif]] <br> <span style="color:#0000FF">'''桔梗'''</span> <br> <span style="color:#0000FF">'''Balloon Flower'''</span> || [[File:Akechi_symbol.gif | 100px]] || [[File:Akechi_shot.gif | 120px]] || [[File:Akechi_charge.gif | 80px]] || #5(Slowest) | ||
| + | |- | ||
| + | | colspan="13" style="text-align:left;" | | ||
| + | |||
| + | Age: 54 | ||
| + | |||
| + | Mitsuhide hints at plotting a rebellion at a renga poetry gathering. | ||
| + | Mitsuhide holds a strip of paper with the words "Now is the time, when the rain falls in May." | ||
| + | "The enemy is at Honnoji Temple!" | ||
| + | |} | ||
| + | |||
| + | {| class="wikitable" style="text-align: center" | ||
| + | |- | ||
| + | ! Character !! Ship !! Symbol !! Shot & Sub Shot !! Charge Attack !! Ship Speed | ||
|- | |- | ||
| [[File:Zuifu_portait.jpg | 100px]] <br> <span style="color:#008000">'''Zuifu Seiryubo'''</span> || [[File:Zuifu_bike.gif]] <br> <span style="color:#008000">'''慈眼'''</span> <br> <span style="color:#008000">'''Merciful Eye'''</span> || [[File:Zuifu_symbol.gif | 100px]] || [[File:Zuifu_shot.gif | 80px]] || [[File:Zuifu_charge.gif | 40px]] || #3 | | [[File:Zuifu_portait.jpg | 100px]] <br> <span style="color:#008000">'''Zuifu Seiryubo'''</span> || [[File:Zuifu_bike.gif]] <br> <span style="color:#008000">'''慈眼'''</span> <br> <span style="color:#008000">'''Merciful Eye'''</span> || [[File:Zuifu_symbol.gif | 100px]] || [[File:Zuifu_shot.gif | 80px]] || [[File:Zuifu_charge.gif | 40px]] || #3 | ||
| + | |- | ||
| + | | colspan="13" style="text-align:left;" | | ||
| + | |||
| + | Age: 23 | ||
| + | |||
| + | In order to offer prayers for the souls of those killed during the attack on Nagashima and to prevent Nobunaga from taking over the country, a young monk filled with a strong sense of justice chooses to become a renegade monk and sets out on a journey to defeat Nobunaga. | ||
| + | |} | ||
| + | |||
| + | {| class="wikitable" style="text-align: center" | ||
| + | |- | ||
| + | ! Character !! Ship !! Symbol !! Shot & Sub Shot !! Charge Attack !! Ship Speed | ||
|- | |- | ||
| [[File:Saika_portrait.jpg | 100px]] <br> <span style="color:#000000">'''Saika Magoichi'''</span> || [[File:Saika_bike.gif]] <br> <span style="color:#000000">'''ヤタガラス'''</span> <br> <span style="color:#000000">'''Eight-Span Crow'''</span> || [[File:Saika_symbol.gif | 100px]] || [[File:Saika_shot.gif | 120px]] || [[File:Saika_charge.gif | 80px]] || #1(Fastest) | | [[File:Saika_portrait.jpg | 100px]] <br> <span style="color:#000000">'''Saika Magoichi'''</span> || [[File:Saika_bike.gif]] <br> <span style="color:#000000">'''ヤタガラス'''</span> <br> <span style="color:#000000">'''Eight-Span Crow'''</span> || [[File:Saika_symbol.gif | 100px]] || [[File:Saika_shot.gif | 120px]] || [[File:Saika_charge.gif | 80px]] || #1(Fastest) | ||
| + | |- | ||
| + | | colspan="13" style="text-align:left;" | | ||
| + | |||
| + | Age: 46 | ||
| + | |||
| + | In the 5th year of Tensho, the Saiga clan surrendered at the Kishu Saiga Siege. | ||
| + | However, their leader, Saiga Magoichi, suddenly disappeared. | ||
| + | What was he thinking when he tried to take Nobunaga's head? | ||
| + | |||
| + | He is the grandfather of Magoichi Saiga from the previous work and the first Magoichi Saiga. | ||
| + | <hr> Unlock Conditions: | ||
| + | On the coin insertion screen, | ||
| + | press the lever up 3 times, down 3 times, up 7 times, then press the start button. | ||
| + | If successful, the whistle will sound. | ||
|} | |} | ||
| Line 81: | Line 144: | ||
====Main & Sub Shots==== | ====Main & Sub Shots==== | ||
| − | Each playable character has a unique main & sub shot | + | Each playable character has a unique main & sub shot; the shots fire in tandem and are triggered by tapping the '''A''' button. |
====Charge Attack==== | ====Charge Attack==== | ||
| − | Each playable character has a unique charge attack | + | Each playable character has a unique charge attack; the charge attack is performed by holding the '''A''' button for a short period and then releasing it. The charge attack can cancel orange bullets, as well as negate the knock back usually suffered from colliding with enemies. |
====Vasara Attack==== | ====Vasara Attack==== | ||
| Line 92: | Line 155: | ||
| − | === Items | + | === Items === |
---- | ---- | ||
{| class="wikitable" | {| class="wikitable" | ||
| Line 98: | Line 161: | ||
! Item !! Description | ! Item !! Description | ||
|- | |- | ||
| − | | [[File:powerup.gif]] || '''Power up''' <br> Increases the player's main shot and sub shot power. Four level power-system. Always awards 1,000 points | + | | [[File:powerup.gif]] || '''Power up''' <br> Increases the player's main shot and sub shot power. Four level power-system. Always awards 1,000 points, the value is increased to 4,000 points if collected while flashing. |
|- | |- | ||
| − | | [[File:crystal.gif]]|| '''Blue Crystal''' <br> Fills the Vasara gauges that are located under the players score | + | | [[File:crystal.gif]]|| '''Blue Crystal''' <br> Fills the Vasara gauges that are located under the players score; approximately 40 crystals per gauge. Crystals always award 100 points, the value increases to 500 points while all three Vasara gauges are full. Normal zako drop one crystal, some medium sized enemies drop multiple crystals. Lanterns found on the ground, which can be destroyed with charge attacks, release five crystals. Whenever a boss's core changes colors, a few crystals are released as well. |
|- | |- | ||
| − | | [[File:smol_gold.gif]]|| '''Small Gold Bar''' <br> | + | | [[File:smol_gold.gif]]|| '''Small Gold Bar''' <br> Appears when you kill ground enemies or structures. Always awards 500 points. The value is increased to 2000 points if collected while flashing. |
|- | |- | ||
| − | | [[File:big_gold.gif]]|| '''Large Gold Bar''' <br> | + | | [[File:big_gold.gif]]|| '''Large Gold Bar''' <br> Appears when certain structures are destroyed with a charge attack. Always awards 5000 points. The value increases to 10000 points if collected while flashing. |
|- | |- | ||
| [[File:1up.gif]]|| '''1UP''' <br> A hidden extend that can be obtained under [[Vasara 2#Unlockable Secrets| certain conditions]]. | | [[File:1up.gif]]|| '''1UP''' <br> A hidden extend that can be obtained under [[Vasara 2#Unlockable Secrets| certain conditions]]. | ||
|} | |} | ||
| − | === Rank | + | === Rank === |
---- | ---- | ||
| − | There are two forms of rank in | + | There are two forms of rank in ''Vasara 2''. |
| − | The first comes in the form of the game mode selected and is static. '''Hard''' mode has increased rank over '''Easy'''. The differences between Easy and Hard are that | + | The first comes in the form of the game mode selected and is static. '''Hard''' mode has increased rank over '''Easy'''. The differences between Easy and Hard are that certain enemy bullets are upgraded to purple bullets, some enemy attack methods are strengthened and added, and there are <span style="color:#A020F0">purple</span> suicide bullets in the second round.<ref name=vasara2_guide>[http://stglove.web.fc2.com/vasara2/main.html STG Love's Vasara 2 Guide]</ref> |
| − | The second | + | The second is dynamic and will change based on player actions, this seems to only affect the number of bullets fired by a boss. Successful consecutive charge attacks will increase the rank of the game. This is referred to as a '''Continuous Slash Bonus''' The increase depends on what mode you selected. In '''Easy''' mode, a full slash chain raises the boss' rank by one level. In '''Hard''' mode it takes about forty consecutive charges to raise the boss' rank by one level, and a full slash chain will result in the boss's rank being raised by two levels. |
| − | The last thing to mention | + | The last thing to mention is the effect an '''All Slash Bonus''' will have on the game's generals(mid bosses). An '''All Slash Bonus''' refers to killing all 25 of the named warlords on a given stage. Contrary to the name, you don't need to kill them with a charge attack to activate the bonus. If this feat is achieved, some mid bosses will be upgraded to a more powerful form; this seems to only affect bullet speeds. |
| − | |||
=== Loops === | === Loops === | ||
---- | ---- | ||
| − | + | ''Vasara 2'' offers a second, and final, loop if the player selects the '''Hard''' difficulty when starting a game. The second loop increases the overall rank of the game and the player plays through the same six stages. There is a TLB and ending waiting at the end of the second loop.{{unconfirmed}} | |
| − | |||
| − | |||
| − | |||
| − | |||
| − | |||
| − | |||
| − | === Scoring | + | === Scoring === |
---- | ---- | ||
| − | ==== Continuous Slash Bonus | + | ==== Continuous Slash Bonus ==== |
| − | The Continuous Slash Bonus is the core scoring mechanic of | + | The '''Continuous Slash Bonus''' is the core scoring mechanic of ''Vasara 2''. Defeating consecutive enemies with a charge attack will start a 'Slash Chain'. The chain count is shown near the players Vasara Gauges. Failing to contact an enemy / structure with a charge attack, losing a life, or finishing a stage, will reset the chain to '''0'''. Damaging an enemy without destroying it and destroying terrain do not add to the chain. Bosses and zako will only add one slash to chains. Destructible boss parts will also add a slash to the chain count. |
The '''formula''' for the ''''Continuous Slash Bonus'''' is: | The '''formula''' for the ''''Continuous Slash Bonus'''' is: | ||
| Line 142: | Line 198: | ||
Ex: 100 + (100 x 100) = 10100 | Ex: 100 + (100 x 100) = 10100 | ||
| − | As shown in the example above, the Continuous Slash Bonus can greatly increase | + | As shown in the example above, the Continuous Slash Bonus can greatly increase scoring potential. Even on the lowest value enemies. |
| + | |||
| + | ==== All Slash Bonus ==== | ||
| + | |||
| + | Each stage has 25 warlords (1 main boss, 4 mid-bosses, and 20 others). Depending on how many are killed, you will get a slash bonus when you clear the stage. The default bonus is 5000 points per warlord. If you kill all 25, you will get a all slash bonus of 150,000 points; if you kill 24, you will only get 120,000 points. | ||
| − | ==== | + | ==== Item Collection ==== |
| − | |||
| − | + | There are a number of [[Vasara 2#Items | items]] the player can collect for points. Some items(Gold Bricks and Powerups) will increase in value if they are picked up while flashing(similar to many Psikyo games). Item collection plays a fairly small part in scoring. However, depending on the character chosen, Blue Crystals can have a significant impact on scoring. | |
| − | ==== | + | ==== Other Sources of Points ==== |
| − | |||
| − | + | There are two more sources of points in ''Vasara 2'', grazing and bullet canceling. | |
| − | == Strategy( | + | '''Grazing''' a bullet will award '''10 points'''. Grazing seems to be calculated in frames, so grazing the same bullet will award points multiple times. |
| + | |||
| + | '''Canceling''' an enemy bullet awards '''10 points''' as well. | ||
| + | |||
| + | Both of these sources of points are negligible, and can be largely ignored. | ||
| + | |||
| + | ==== Scoring Priority ==== | ||
| + | <span style="color:#FF0000">'''Continuous Slash Bonus >>>>>> All Slash Bonus > Item Collection'''</span> | ||
| + | |||
| + | The '''Continuous Slash Bonus''' is by far the most import aspect to scoring ''Vasara 2''. Breaking chains at the wrong time can result in hundreds of thousands of points lost. The '''All Slash Bonus''' is a much lesser portion of overall score potential, but should come naturally when maximizing the '''Continuous Slash Bonus'''. Item collection plays very little role overall, but can have some indirect effects on other facets of scoring. For example: The collection of more '''Blue Crystals''' can lead to Vasara gauges being filled faster. This allows the player to use Vasara attacks more often, possibly raising the '''Continuous Slash Bonus''' further. | ||
| + | |||
| + | == Strategy(TODO) == | ||
<div style='text-align: center;'> | <div style='text-align: center;'> | ||
''See [[(Template Page)/Strategy]] for '''stage maps''', '''enemy and boss descriptions''', '''walkthroughs''', and '''advanced play strategies'''.'' | ''See [[(Template Page)/Strategy]] for '''stage maps''', '''enemy and boss descriptions''', '''walkthroughs''', and '''advanced play strategies'''.'' | ||
| + | |||
| + | ''See [[Vasara 2/Strategy]] for '''stage maps''' and '''advanced play strategies'''.'' | ||
</div> | </div> | ||
---- | ---- | ||
| Line 165: | Line 236: | ||
==== Rank Control ==== | ==== Rank Control ==== | ||
| − | == Story( | + | If a player wants to control rank for a survival focused clear, they have a number of options: They can skip one of the named warlords to avoid upgrading mid-bosses, reset their rank just before a boss fight(or during) to lower the boss' difficulty, or avoid long slash chains altogether. All of these methods are detrimental to scoring. That being said, it is generally recommended to reset rank before engaging an end of stage boss from stage 3 onward(even while scoring). This is due to the lack of scoring potential in comparison to the Stage 1 & 2 bosses. |
| + | |||
| + | == Story(TODO) == | ||
| + | |||
| + | <div style='text-align: center;'> | ||
| + | ''See See [[Vasara 2/Bosses]] for detailed boss descriptions'''.'' | ||
| + | <hr> | ||
| + | </div> | ||
| + | |||
Basic story breakdowns, plot information, and endings are included here. | Basic story breakdowns, plot information, and endings are included here. | ||
If there is no story at all, or any information about the setting, then this section can be omitted. Try to include at least small things here when you can. | If there is no story at all, or any information about the setting, then this section can be omitted. Try to include at least small things here when you can. | ||
| + | |||
| + | |||
---- | ---- | ||
| − | == Development History( | + | == Development History(TODO) == |
If available, you can include information here about the hardware, the development of the game, and its general reception. ''Try to have as much information in this section cited as possible.'' | If available, you can include information here about the hardware, the development of the game, and its general reception. ''Try to have as much information in this section cited as possible.'' | ||
---- | ---- | ||
| − | == Version Differences( | + | == Version Differences(TODO) == |
* Include information here about differences in a game between various versions. This includes regional differences, patch updates/bugfixes, and the like. | * Include information here about differences in a game between various versions. This includes regional differences, patch updates/bugfixes, and the like. | ||
---- | ---- | ||
| − | == Trivia( | + | == Trivia(TODO) == |
* Cool facts and random tidbits go here! | * Cool facts and random tidbits go here! | ||
---- | ---- | ||
| − | == | + | == GalleryTODO) == |
<div style='text-align: center;'> | <div style='text-align: center;'> | ||
''See [[(Template Page)/Gallery]] for our collection of images and scans for the game.'' | ''See [[(Template Page)/Gallery]] for our collection of images and scans for the game.'' | ||
</div> | </div> | ||
---- | ---- | ||
| − | |||
| − | |||
| − | |||
| − | |||
| − | |||
| − | |||
| − | |||
| − | |||
| − | |||
| − | |||
| − | |||
== References & Contributors == | == References & Contributors == | ||
<small> | <small> | ||
| − | |||
| − | |||
| − | |||
| − | |||
| − | |||
| − | |||
| − | |||
| − | |||
| − | |||
| − | |||
| − | |||
| − | + | [[Category:Vertical orientation]] | |
Latest revision as of 01:57, 12 August 2025
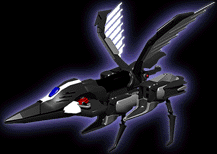
Title screen
| Developer: | Visco |
|---|---|
| Director: | Teruhiro Yamada |
| Music: | Kennosuke Suemura |
| Art: | Tetsuya Mizutani Yasuhiro Sawamura Yoriko Date Hiromi Kashiwamata Hiroshi Yamamoto |
| Release date: | 2001 |
| Previous game: | Vasara |
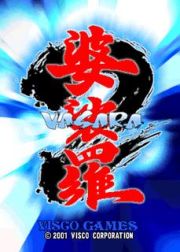
Vasara 2 is the second and finale game in the Vasara series of shoot-em-ups, as well as the finale game to be developed and released by Visco. Unlike most games of the genre, Vasara 2 draws heavily from the history of feudal Japan, rather than depicting a possible future. The game features a 'Sengoku-steampunk'[1] theme similar to Psikyo's Sengoku Ace series.
The Vasara series was ported to modern platforms in the form of the VASARA Collection on August 13, 2019.
For replay videos, visit the Video Index.
Contents
Gameplay Overview
Vasara 2 is a two-button shooter.
Unlike most other games of the genre, the player is not destroyed or powered down when coming into contact with an enemy. Instead, they're knocked backwards at an angle relative to the point and direction of contact.
There are two modes available for play: Easy and Hard
Easy: 1 Loop, 6 Stages, Lower rank
Hard: 2 Loops, 6 stages(12 total), Higher rank, TLB?, and True ending.?
Controls
- A (Press): Fires the players shots in tandem (Main and Sub).
- A (Hold): Charges the players charge attack. Release to use.
- B: Unleashes a Vasara attack.
Unlockable Secrets
The games one and only extend drops from the nineteenth mid-boss defeated (third mid-boss of stage five at earliest).[2]
There is a TLB and ending waiting at the end of the second loop.?
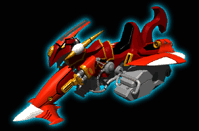
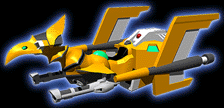
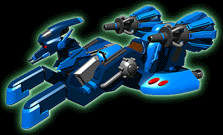
Characters / Ships
Weapons
Main & Sub Shots
Each playable character has a unique main & sub shot; the shots fire in tandem and are triggered by tapping the A button.
Charge Attack
Each playable character has a unique charge attack; the charge attack is performed by holding the A button for a short period and then releasing it. The charge attack can cancel orange bullets, as well as negate the knock back usually suffered from colliding with enemies.
Vasara Attack
Vasara attacks act as this game's bomb equivalent. While using a Vasara attack, the player deals constant damage to enemies slashed, cancels orange bullets slashed, becomes invulnerable, and destroys purple bullets upon contact. A player may have up to three Vasara attacks saved(shown under the players score), and they are refilled by collecting blue gems throughout the game.
Items
| Item | Description |
|---|---|
| Power up Increases the player's main shot and sub shot power. Four level power-system. Always awards 1,000 points, the value is increased to 4,000 points if collected while flashing. | |
| Blue Crystal Fills the Vasara gauges that are located under the players score; approximately 40 crystals per gauge. Crystals always award 100 points, the value increases to 500 points while all three Vasara gauges are full. Normal zako drop one crystal, some medium sized enemies drop multiple crystals. Lanterns found on the ground, which can be destroyed with charge attacks, release five crystals. Whenever a boss's core changes colors, a few crystals are released as well. | |
| Small Gold Bar Appears when you kill ground enemies or structures. Always awards 500 points. The value is increased to 2000 points if collected while flashing. | |
 |
Large Gold Bar Appears when certain structures are destroyed with a charge attack. Always awards 5000 points. The value increases to 10000 points if collected while flashing. |
| 1UP A hidden extend that can be obtained under certain conditions. |
Rank
There are two forms of rank in Vasara 2.
The first comes in the form of the game mode selected and is static. Hard mode has increased rank over Easy. The differences between Easy and Hard are that certain enemy bullets are upgraded to purple bullets, some enemy attack methods are strengthened and added, and there are purple suicide bullets in the second round.[2]
The second is dynamic and will change based on player actions, this seems to only affect the number of bullets fired by a boss. Successful consecutive charge attacks will increase the rank of the game. This is referred to as a Continuous Slash Bonus The increase depends on what mode you selected. In Easy mode, a full slash chain raises the boss' rank by one level. In Hard mode it takes about forty consecutive charges to raise the boss' rank by one level, and a full slash chain will result in the boss's rank being raised by two levels.
The last thing to mention is the effect an All Slash Bonus will have on the game's generals(mid bosses). An All Slash Bonus refers to killing all 25 of the named warlords on a given stage. Contrary to the name, you don't need to kill them with a charge attack to activate the bonus. If this feat is achieved, some mid bosses will be upgraded to a more powerful form; this seems to only affect bullet speeds.
Loops
Vasara 2 offers a second, and final, loop if the player selects the Hard difficulty when starting a game. The second loop increases the overall rank of the game and the player plays through the same six stages. There is a TLB and ending waiting at the end of the second loop.?
Scoring
Continuous Slash Bonus
The Continuous Slash Bonus is the core scoring mechanic of Vasara 2. Defeating consecutive enemies with a charge attack will start a 'Slash Chain'. The chain count is shown near the players Vasara Gauges. Failing to contact an enemy / structure with a charge attack, losing a life, or finishing a stage, will reset the chain to 0. Damaging an enemy without destroying it and destroying terrain do not add to the chain. Bosses and zako will only add one slash to chains. Destructible boss parts will also add a slash to the chain count.
The formula for the 'Continuous Slash Bonus' is:
Base Enemy Value + (Chain Count x 100)
Ex: 100 + (100 x 100) = 10100
As shown in the example above, the Continuous Slash Bonus can greatly increase scoring potential. Even on the lowest value enemies.
All Slash Bonus
Each stage has 25 warlords (1 main boss, 4 mid-bosses, and 20 others). Depending on how many are killed, you will get a slash bonus when you clear the stage. The default bonus is 5000 points per warlord. If you kill all 25, you will get a all slash bonus of 150,000 points; if you kill 24, you will only get 120,000 points.
Item Collection
There are a number of items the player can collect for points. Some items(Gold Bricks and Powerups) will increase in value if they are picked up while flashing(similar to many Psikyo games). Item collection plays a fairly small part in scoring. However, depending on the character chosen, Blue Crystals can have a significant impact on scoring.
Other Sources of Points
There are two more sources of points in Vasara 2, grazing and bullet canceling.
Grazing a bullet will award 10 points. Grazing seems to be calculated in frames, so grazing the same bullet will award points multiple times.
Canceling an enemy bullet awards 10 points as well.
Both of these sources of points are negligible, and can be largely ignored.
Scoring Priority
Continuous Slash Bonus >>>>>> All Slash Bonus > Item Collection
The Continuous Slash Bonus is by far the most import aspect to scoring Vasara 2. Breaking chains at the wrong time can result in hundreds of thousands of points lost. The All Slash Bonus is a much lesser portion of overall score potential, but should come naturally when maximizing the Continuous Slash Bonus. Item collection plays very little role overall, but can have some indirect effects on other facets of scoring. For example: The collection of more Blue Crystals can lead to Vasara gauges being filled faster. This allows the player to use Vasara attacks more often, possibly raising the Continuous Slash Bonus further.
Strategy(TODO)
See (Template Page)/Strategy for stage maps, enemy and boss descriptions, walkthroughs, and advanced play strategies.
See Vasara 2/Strategy for stage maps and advanced play strategies.
Shot or Charge Attack
Vasara Usage
Rank Control
If a player wants to control rank for a survival focused clear, they have a number of options: They can skip one of the named warlords to avoid upgrading mid-bosses, reset their rank just before a boss fight(or during) to lower the boss' difficulty, or avoid long slash chains altogether. All of these methods are detrimental to scoring. That being said, it is generally recommended to reset rank before engaging an end of stage boss from stage 3 onward(even while scoring). This is due to the lack of scoring potential in comparison to the Stage 1 & 2 bosses.
Story(TODO)
See See Vasara 2/Bosses for detailed boss descriptions.
Basic story breakdowns, plot information, and endings are included here.
If there is no story at all, or any information about the setting, then this section can be omitted. Try to include at least small things here when you can.
Development History(TODO)
If available, you can include information here about the hardware, the development of the game, and its general reception. Try to have as much information in this section cited as possible.
Version Differences(TODO)
- Include information here about differences in a game between various versions. This includes regional differences, patch updates/bugfixes, and the like.
Trivia(TODO)
- Cool facts and random tidbits go here!
GalleryTODO)
See (Template Page)/Gallery for our collection of images and scans for the game.
